AN015 - How to install custom panels
The purpose of this application note is to illustrate steps to install custom panels and start its from RosettaCNC top bar.
1. Steps to install
- Install control software version 1.9.6 or later 64-bit version.
- 64-bit version also install an embedded python version located in
%LocalAppData%\Programs\RosettaCNC.python - Open a Windows command prompt at
%LocalAppData%\Programs\RosettaCNC.python - Type:
python -m pip install --upgrade --force-reinstall pip
- Install necessary python libraries with the follows commands:
Scripts\pip install cnc-api-client-coreScripts\pip install pyside6Scripts\pip install numpy
- Unpack the attached archive in a folder of your preference.
- Open your control software and go to
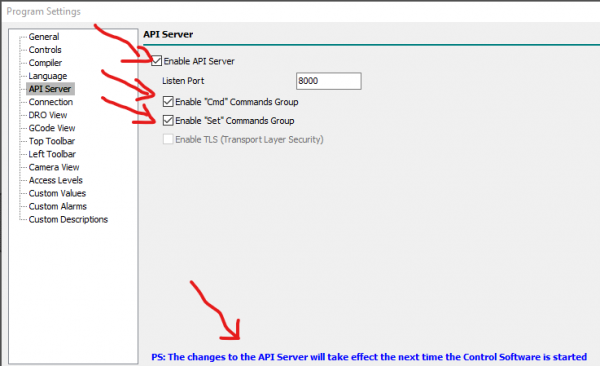
Program Settings. Enable API server: - Restart control software.
- Set in Program Settings panel→ External Programs fields as:
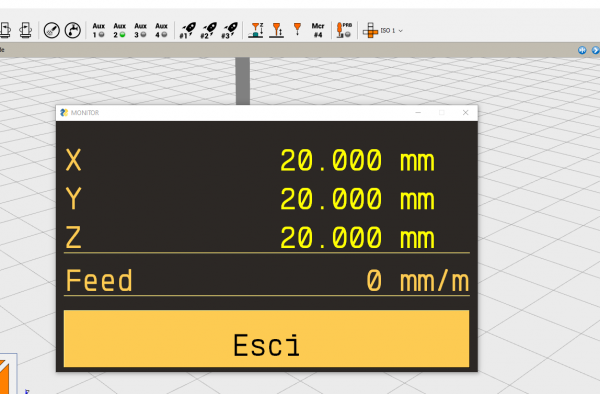
- Two new icons appairs in top toolbar to start new panels
- If you want a customized icon place a icon file named
external_program_1_E01.pngin%APPDATA%\RosettaCNC-1\customizefolder. For other info please refer to%APPDATA%\RosettaCNC-1\customize\readme.txtfile.
2. Attached files
3. Multiple cuts panel
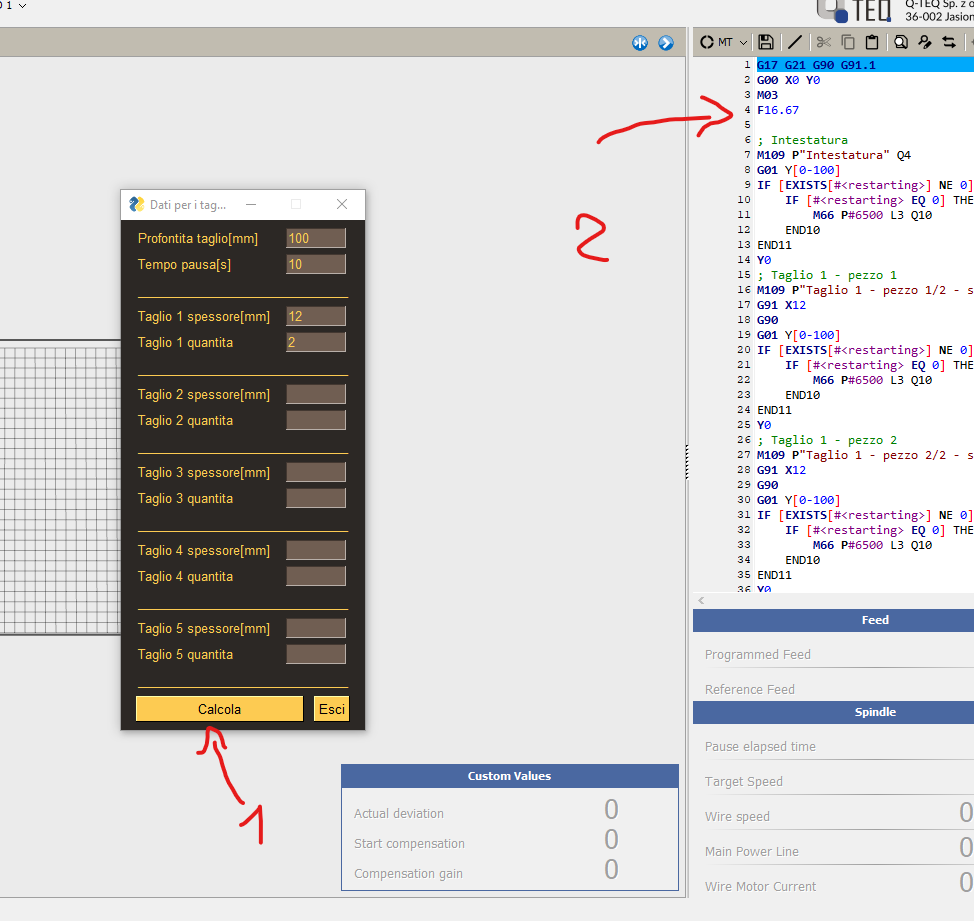
This is a very simple panel to set the same application target position and repetition. When you press the Calcola button, related code will be set in main control software editor.
4. Auto learn panel
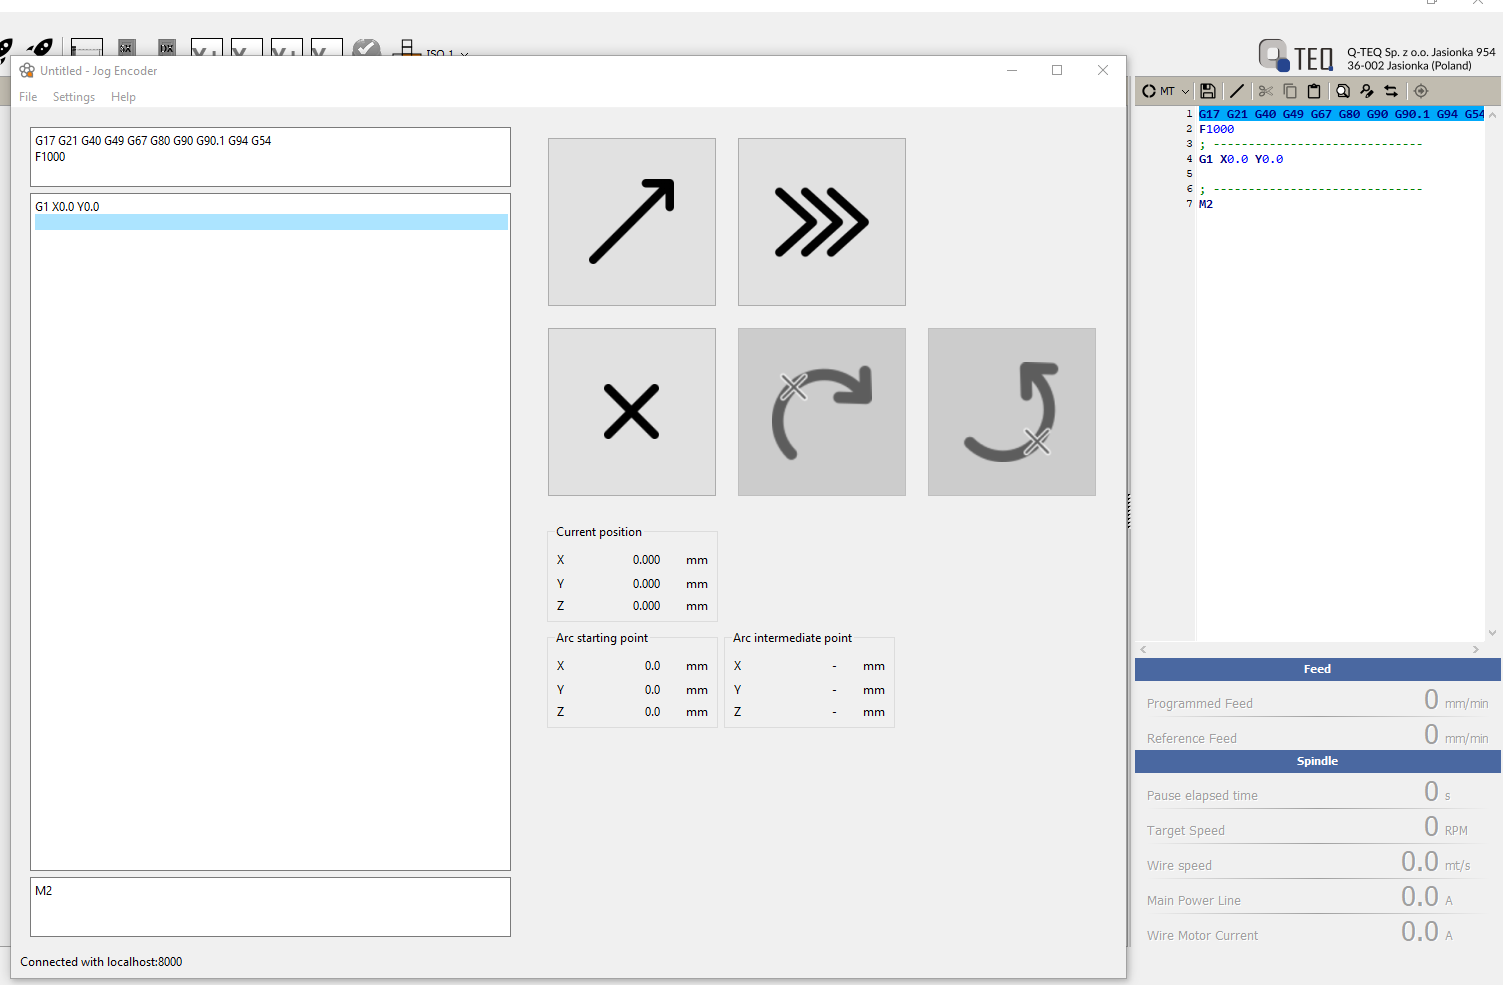
This is a panel that can be used to auto compose a gcode part program by moving the machine and press a button. Every time you press the button you can define if the actual machine position is a point if for a feed linear movement, rapid or is a part of arc definition.
Tha panel have a header and a tail so part program is every time valid for compile and preview.


